|
You've recorded your podcast, edited and mixed it, and uploaded the final MP3 to your hosting service... now what? Now you need to get it everywhere so that it can be heard.  Listening to podcasts frees up your eyes so you'll notice the ceiling more often, and its delights! The RSS FeedThe RSS feed of your podcast is created by your Host service - if you're setting up your own host platform, you'll need to write your own RSS feed. An RSS feed is a type of web feed that allows applications (podcast apps) to get updates from websites. So whenever you upload and publish a new podcast episode, the RSS feed will reflect the update and send the new information to the various podcast syndication platforms (iTunes, TuneIn, Stitcher, Spotify, etc) which will then have access to the new episode. 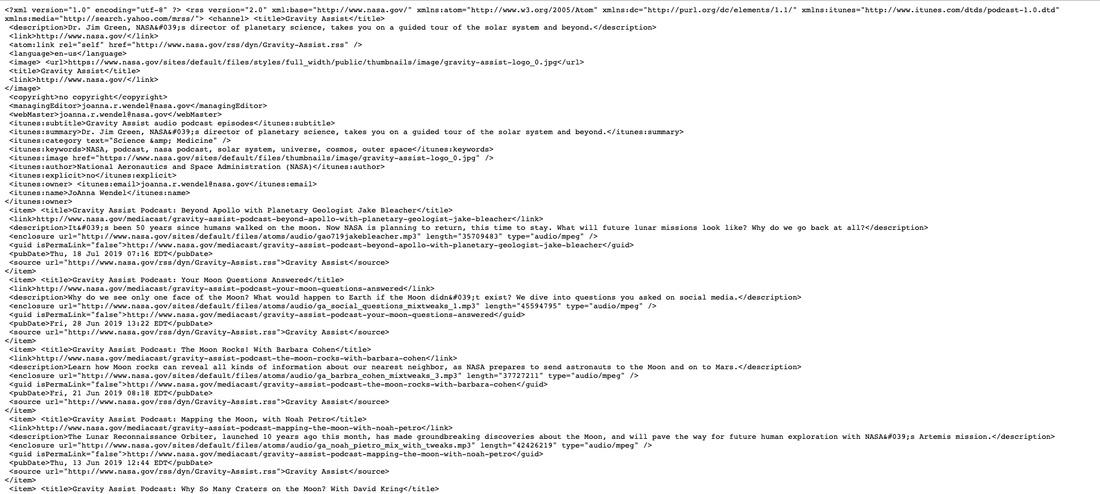 A typical RSS feed. Hosting ServicesA lot of Host platforms (Libsyn, Blubrry, Anchor, etc) offer some degree of distribution to syndication platforms for your published episodes. But, just in case yours doesn't, I'll list a few here with links where you can submit your podcast's RSS feed. The RSS feed is coded in an XML file accessible as a URL, like a website address, and is accessible through your host platform, for example: www.yourpodcasthost.com/yourpodcastname.xml This URL is what you copy and paste, and send to the various syndication platforms to get your podcast submitted.  Even though Chloe, Dave, Martin, Isobel, and Emma all used different podcast apps, they were all able to listen to the same episode of the same podcast at the same time, and annoy the people below them. Popular Syndication PlatformsThe Big 3 • Apple Podcasts - many podcast apps get their info from Apple Podcasts, so this is an important one to be on. You'll need to create an Apple ID if you haven't already got one. • Spotify - one of the largest music streaming services does podcasts too, and owns Anchor and Gimlet Media. You'll need to create an account (free) to submit your podcast. • Google Podcasts - there's no direct submission process, the Google Podcast app, like Google, just finds podcasts and lists them... this might take a while, try the app to see if your podcast is there, and if not then search for it within the app's search function. There are many more places to submit your podcast feed - the more the merrier: • Deezer • iHeartRadio • PodKnife • PlayerFM • TuneIn  "In order to grow your audience, you must be in as many places as possible" - Sam Wanwise.
0 Comments
In this post I'll go over the different types of Digital Audio Formats most common to Podcasting - which are recommended for recording podcast audio, and which are recommended for publishing mixed podcast episodes.  A selection of Digital Audio formats supported by Audacity. Lossless AudioIn simple terms, Lossless means that all of the recorded audio data is retained - the frequency range and dynamic range of the audio is exactly the same, what goes in is what comes out. Ideally, all audio should be recorded initially in a Lossless format as mentioned in the post on Recording Techniques. Lossless Formats WAV (Waveform Audio File) is pretty much a universal standard, available on PC and Mac systems. WAV files are limited to a maximum of 4GB is size, an in some cases 2GB. A WAV audio file of 16-bit/44.1kHz is CD quality. AIFF (Audio Interchange File) is comparable to WAV and is also universally used; it was developed by Apple. Compressed Lossless Formats FLAC (Free Lossless Audio Codec) and ALAC (Apple Lossless Audio Codec) are both Lossless formats that use a Codec - the lossless data is compressed, making the file's size smaller but retaining all of the data. If you have particularly clean recordings done in a studio, FLAC/ALAC can be useful as the silence between words can be compressed to a minimal amount of data, resulting in significantly smaller files.  Psychoacoustics: If you say "Cheese" really slowly, it sounds like you're saying "Gullible". True story. Lossy Audio FOrmatsLossy audio formats reduce the file size by removing or simplifying the data. As you'd expect, removing data results in a loss of fidelity - however, lossy codecs use various techniques (such as Psychoacoustics) to minimise the perceived difference. However, the greater the amount of compression applied, and the more data that is removed, the more noticeable the degradation of the audio quality - compare a piece of music encoded at 320kbps MP3 to one encoded at 64kbps MP3 for a clear example. The effect is less obvious, to some extent, on the human voice due to the lower frequency and dynamic range of speech compared to music. Lossy Audio Formats MP3 is the most well-known and widespread of all the Lossy formats. M4A/AAC (Advanced Audio Coding) is a standard developed by Apple as part of the MP4 standard, and has superior fidelity compared to MP3. M4A is the standard used by both iTunes and YouTube. Both MP3 and M4A support ID3 metadata.  Never forget. What to Use, and When to Use itRecording & Mixing As mentioned before, you should record in a Lossless format if possible (some phone or tablet apps might not support Lossless recording), ideally at 24-bit/44.1kHz in this writer's opinion. Why? At 24-bit you've plenty of headroom for the unexpected loud sounds of excitable discussions and will avoid clipping distortion; of course, if your podcast is of the calm and tranquil sort, then 16-bit will be just fine. A sample rate of 44.1kHz will capture the complete frequency range of the human voice - very few people have voices that go above 18,000Hz, and if they do you probably don't want to listen to them for too long, and the dogs will start howling. There is minor benefit to using 48kHz sample rate, if you don't mind the larger file size... You should try to avoid degrading the audio quality until exporting the final mix, i.e. if you've recorded at 24-bit 44.1kHz, then edit and mix at 24-bit 44.1kHz - don't convert the recording to a lesser format before editing. Exporting Recommended Specifications for podcasts: 128kbps Stereo / 96kHz Mono, M4A at 44.1kHz (if you recorded at 48kHz you might as well keep it at 48, otherwise what was the point in the first place?). If your podcast doesn't have any music in it, or you really need to make the files smaller due to hosting constraints, you can go down to 64kbps Stereo / 32kbps Mono - but do experiment and hear for yourself at what point you're happy with the compromise of file size : audio quality. All that said, there's nothing stopping you from using 256kbps or higher, if fidelity is important to your podcast's sound - popular storytelling podcasts that incorporate a high degree of sound design tend to use higher standards, e.g. Lore.  To induce trance-like states in listeners, at least 128kbps is recommended. Addendum: .MOV filesI'm adding this here, because I don't really know where to put it... A few applications popular among podcasters save recordings as .MOV files, for example Ecamm Skype call recorder. MOV (QuickTime File) is a container conforming to the MP4 standard, for video and/or audio. The specifics of the audio can be set to either Lossless (AIFF) or Lossy (AAC) prior to recording. Thanks for Reading!In this post I'll go over the various solutions to recording conversations and interviews remotely over the internet, using VOIP and hardware work-arounds. Are you ready?  Ready, Headset, Record! VOIP Solutions VOIP (Voice Over Internet Protocol) is the transmission of live streaming audio and video, from one computer/device to another, over the internet. Skype Skype is a well known VOIP call app available for desktop computers, tablets and cellphones. You used to need a third-party app to record Skype conversations, but recently it's been added as a feature. Here is Skype's own How-To on recording. The How-To article also lists the third-party apps for use with older versions of Skype (version 7 and older). Some are free, some are paid, and their abilities and recording quality vary slightly. Skype's built-in recording will combine all voices in to one track, so you won't be able to edit individual voices yourself. Some of the third-party apps allow for multitrack recording, for example Ecamm. Zoom Zoom is similar to Skype, and is gaining popularity. It features built-in recording options, and is capable of recording each side of the conversation as separate audio files without the need for a third-party app. Here is Zoom's own How-To guide for recording. The Rest There is a menagerie of VOIP services with dedicated recording abilities designed for Podcasters, Radio, and other broadcast facilities. Their costs and features vary, which one you choose to use will depend on whichever meets your needs best, here are a few of them: • Zencastr • Cast • Ringr • Cleanfeed • SquadCast • Source-Connect  It was as if Mabel was in the same meadow as Betty, and not 74.3km away in some other field! Hardware TechniquesThere are a couple of hardware work-arounds for remote recording... The "Double Ender" Technique In the simplest of terms, each person records their side of the conversation themselves, separately, while talking over the phone or a VOIP app. Person A might record their voice directly into Audacity, while Person B records their voice using a handheld recorder. When done right, this method will give the best results than any other. The Mix-Minus Technique Using this setup, you effectively record each side of a two-way conversation to a DAW/digital recorder on separate tracks. This is fiddly to setup, but done right you can get great results. I'm not going to go into the how-to, as it's all very well explained here already.  Dave knew something was terribly wrong, even though it felt so right. Tips to get the best results• Make sure everyone is on the same page, and knows what's what, and presses Record. • Use the same audio recording settings everywhere, throughout, one both sides, all the time, wherever - different sample rate settings can lead to recordings drifting out of sync. • Close down all unnecessary applications, especially any that use your internet connection. This goes for you and your guest! Any other apps using the internet connection will reduce the available bandwidth, which will degrade the audio quality and can result in glitches. • Disable Video, if the VOIP has a video option, turn it off - video will use up a lot of internet bandwidth. • Everyone wears headphones and turns off their computer's speakers. If your voice comes out of their computer's speakers, that will be picked up by their mic and come back to you as an echo, and will be recorded. And echos are not easy to get rid of in post production. • Do a test recording. If time allows, do a run-through to sort out any potential problems. Thanks for Reading!Getting good sound right from the start will avoid many headaches and complications that may crop up in post production (editing & mixing). In this post I'll go over some techniques and things to consider when recording to help get the best results.  Despite not being plugged in, the mic still worked. But it's wasn't Steve's voice that he heard... Microphone Know-HowMicrophone Selection Using the correct microphone for the job is step one. As mentioned in this post, I recommend using a Dynamic mic with a Cardioid polar pattern. Dynamic mics are straightforward to use, they are less sensitive to ambient noise, and handle loud/dynamic voices well. Using a mic with a Cardioid polar pattern (or Super-/Hyper-Cardioid) means better off-axis rejection of sound, so less bleed from other voices, and less ambient noise. PositioningAs the saying goes, "Location, Location, Locution." Or something like that. If you don't have access to a soundproof studio, use the quietest room in your home/office. Once you've sorted out the acoustics, position the mic where it's not in the way, but still in your face. A tricky compromise. Make sure that you're comfortable - depending on your podcast, you might be sat for sometime... • Position the mic away from nearby reflective surfaces - walls, table tops, floors etc, unless those surfaces have some degree of acoustic treatment. Hard reflective surfaces can bounce sound towards the mic, resulting in Phasing, Distortion, and echoing. • Position the mic 15-30 cm away from you, within a 120 degree arc in front of you. This is to avoid the Proximity Effect, where low frequencies are increased when the mic is too close to the source. • Have the mic above/below you, and aimed at your mouth. By having the mic slightly out of the way, you avoid Plosives and excessive breathes. Using a Pop-Filter is still a good idea, to catch those plosives that might slip through. ListenUse Headphones. When setting the levels and while recording - listen to what is being recorded. If something comes through in the recording, you can easily pause for a moment, wait while the truck drives past, and then continue - it'll make cutting it out later much easier! Also be aware of noises that you make - bumping of the mic stand, banging the table, ruffling clothes... If you hear it while recording, it's because the mic's picking that noise up. A few seconds taken to repeat something while recording is much easier than trying to fix it in post. Remember that a Cardioid mic is directional - if you move away from it, or off-axis to the mic's capsule, your voice will become quieter. Higher frequencies are also more directional than lower frequencies, meaning that if you move away from the mic your voice can become less clear. Monitoring yourself while recording will help you stay in the sweet spot in front of the mic!  A mic and headphones, just hanging out. Using an Audio Processing ChainYou may be using a Channel Strip, or an Audio Interface that has some features such as an EQ, Compressor, De-Esser... or you might use plugins in your DAW on the monitoring output. Whatever you do, especially if you're using a Channel Strip or Audio Interface, make sure it sounds good - remember that what you hear is what is being recorded. Badly EQ'd, or heavily compressed audio is difficult to salvage after recording. Just ask Cher. Using a DAW and plugins can make life easier, assuming it's non-destructive and the plugin effects are applied in real-time and not committed while recording, since you'll be able to correct settings as you go. 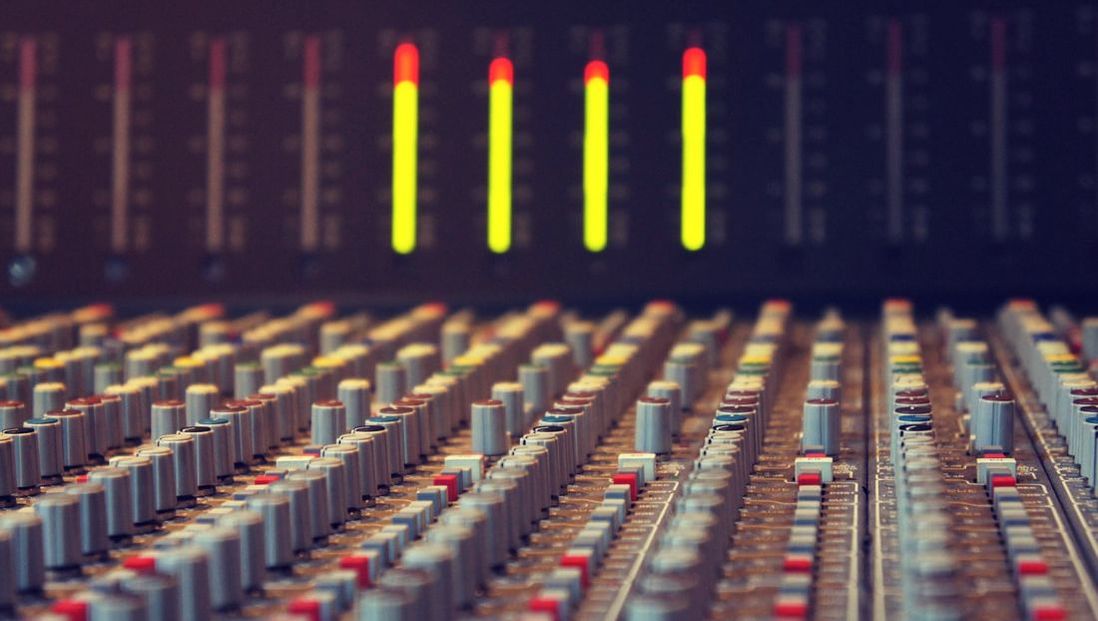 Red = Bad. Setting Recording LevelsAll the while that you're setting up your mic and positioning it, and getting the parameters of anything in your audio processing chain just right - always keep an eye & ear on your recording input levels. Ideally, you're recording you audio in a lossless format (WAV/AIFF) and at a suitable bit-depth and sample rate (at least 16-bit & 44.1 kHz). Bit Depth determines how loud you can go - for every Bit you get ±6dB of dynamic range, so at 24-bit you get 144dB (about at loud as a jet taking off). Sample Rate determines the frequency range of the signal. According to the Nyquist Theorem, the sample rate must the 2x the highest frequency that is to be recorded. The Human Voice has an approximate range of 80Hz up to 10,000Hz, so to record the full range the sample rate should be 22,050Hz - for reasons I won't go into, standard practice is to record at 44,100Hz (44.1kHz). It's just better, though there is reason to even record at 48kHz - but I'll let you google that and decide for yourself. OK. Are you still with me? Good. Clipping occurs when the audio signal being recorded (or mixed) exceeds the Bit Depth - the system runs out of Bits and literally flat-lines. The result, sonically, is a distorting crackle that can be heard and effectively ruins the audio quality. As a visual indicator, most audio recording devices and DAWs have meters that display the audio signal. As a guide, you don't want the meters to go to the very top, or to go into the red. Leave room for the signal to be able to fluctuate with your voice. Clipping can be heard when monitoring, so use those headphones as well as your eyes checking the meters. Play around with the gain setting of your pre-amp to find the right level to avoid any signal distortion. An optimal recording level will be around 50%-70% (around -23dBFS/LUFS), but this is just a guide - use your ears and best judgement. As mentioned above, recording at 24-Bit will give you 144dB of dynamic range, which you should really struggle to clip while recording a podcast unless your podcast's topic is combustion engines/drums/cannons/rock concerts. 16-Bit will give 96dB or range, which for normal conversations is usually fine, unless you get very excitable. TL;DR - Red = Bad. Thanks for Reading!In this post I'll go over what Sound-Proofing is, what Acoustic Treatment is, and how to get the best possible results when recording. 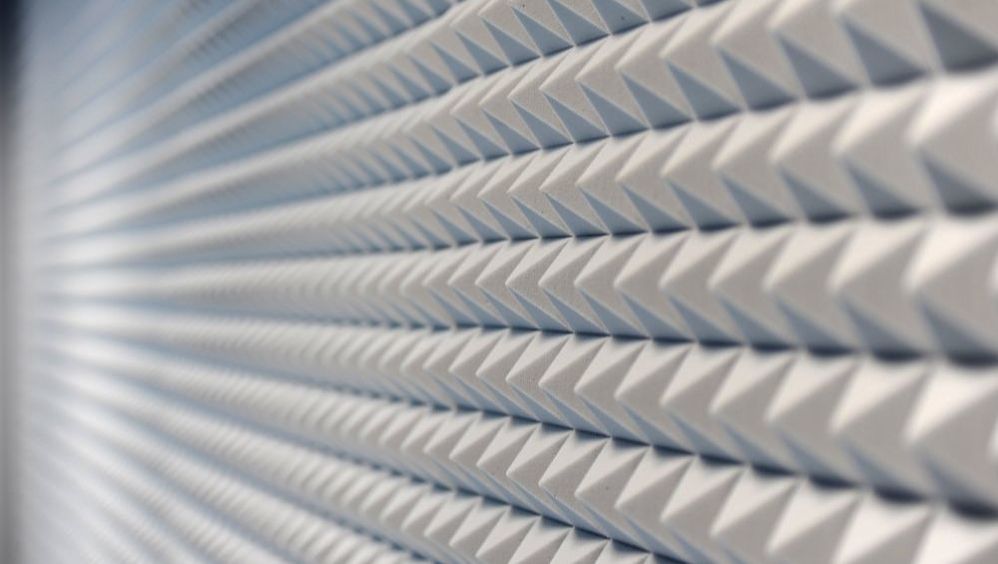 Pyramid Foam Acoustic Panels. There's a difference - Sound-Proofing & Acoustic TreatmentFirst off, Acoustic Treatment and Sound-Proofing are not the same thing. All sound-proofing is to do with acoustic treatment, but not all acoustic treatment is to do with sound proofing. Sound-proofing prevents the transmission of sound from one space to another - walls, sealed windows and doors provide sound-proofing. Open a window and have a listen, then close it and listen again - the difference can be significant. When it comes to recording your podcast, you don't want that loud traffic or neighbour's dog in the background. Professional studios spend $$$, even $$$$$$ to make a space completely sound-proof by building rooms-within-rooms, having floating floors and suspended ceilings, decoupled walls, heavy solid doors, and double or tripled glazed windows. Most of us don't have that kind of budget - but there are simple and affordable solutions that can yield good results. Acoustic treatment affects the properties of sound in a space, such as echo and reverb - hard surfaces reflect sound, soft materials absorb sound, and objects disperse sound. Think of a tiled bathroom with a lot of hard reflective surfaces - sound echoes around and around... Now think of a carpeted room with couches, chairs, books and stuff hanging on the walls - sound is absorbed and diffused by the soft materials and objects. Effective acoustic treatment is fairly affordable, and there are commercial products and DIY solutions that can be easily applied. 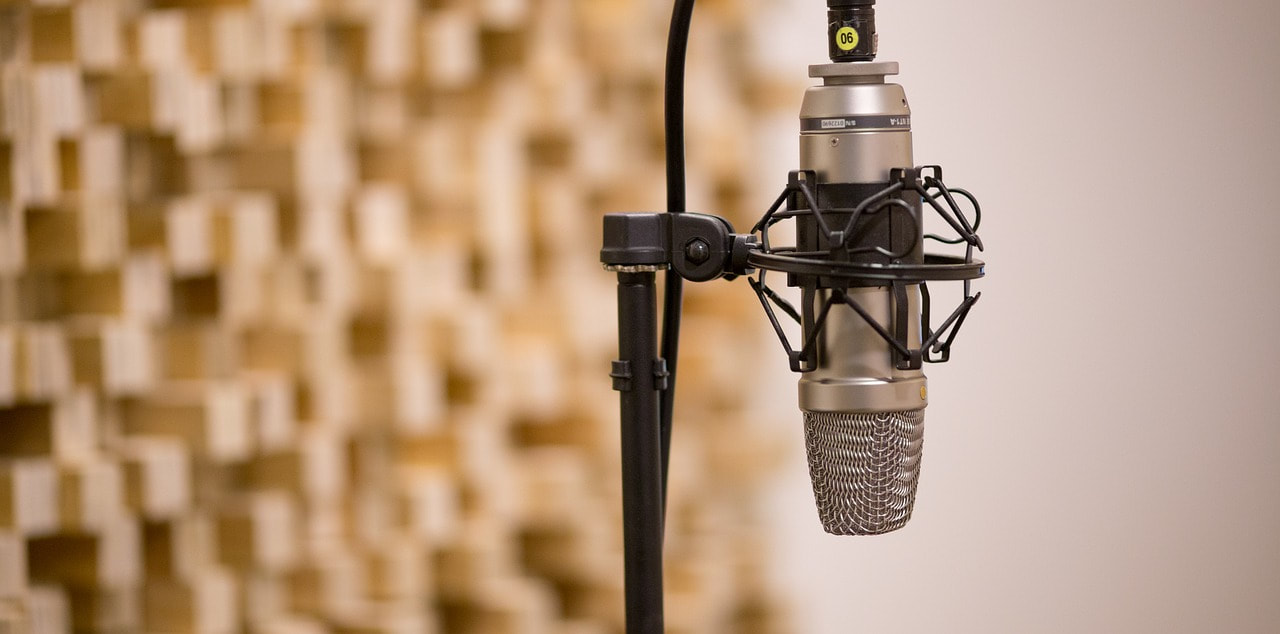 In the blurry background: A DIY wooden block diffuser. Sound-Proofing SolutionsBasic Stuff Close all windows and doors. And close the windows and doors in adjacent rooms. If you can, use a rubber or neoprene seal that can be fitted around the frame of any doors and windows to reduce the amount of sound coming in & going out. Complex Stuff • Floors can be "floated" - a secondary floor is built upon the structural floor of the room, and is supported by vibration-dampening materials. • Ceilings can be suspended - a secondary ceiling is put in place, either hung from the structural ceiling or integrated into de-coupled walls. • De-coupled walls - secondary walls, with an air gap between them and the structural walls, built of brick/cement block, or heavily insulated. Acoustic SolutionsBasic Stuff Carpets, curtains (closed), cushions, wall-hangings and soft furnishings - foam and fabric will absorb sound waves and dampen them to some extent. Having a felt table cloth on the table that your recording equipment is set up on will reduce immediate reflections. Complex Stuff • Absorption - whether commercial products like foam panels or DIY panels of rockwool, increasing the amount of sound absorbing materials in a room helps to reduce the amount of echo and reverb. • Diffusion - having objects and angular surfaces helps to distribute sound waves and thereby weaken them, the more the sound bounces around, the sooner it dissipates. Auralex is one of many companies that produce sound-proofing and acoustic treatment products. They also have a very nice PDF that explains these concepts in depth, here's a link. Various forums and websites also provide guidance for the DIYers out there. 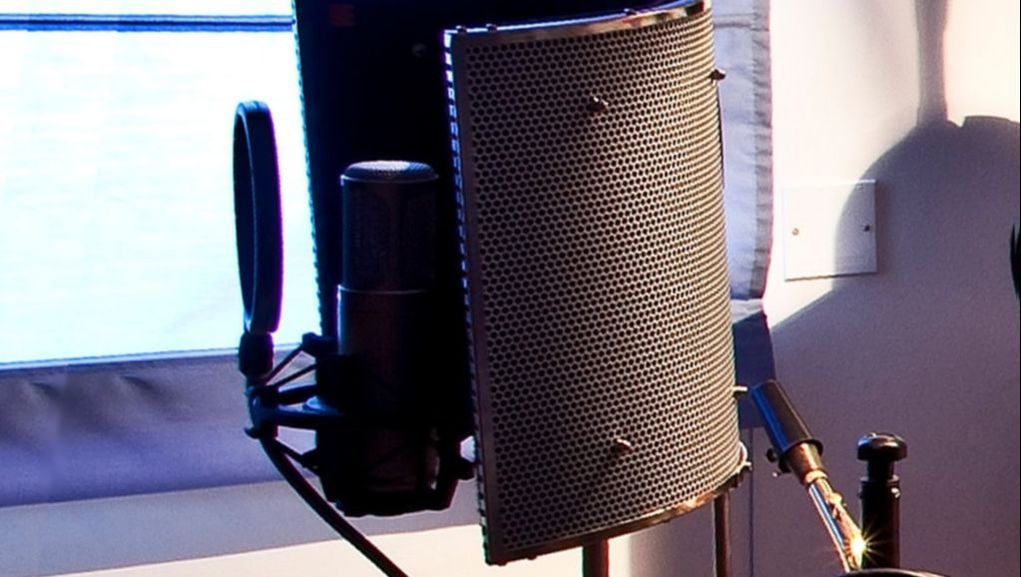 A microphone reflection filter. AlternativesThere are products for those on a budget or who do not have the luxury of a good space to record in, or those who record on the move in difference spaces in different places. Aside from good mic technique and positioning, you can use portable booths that will partially isolate the mic from its surroundings, whether its a screen like in the image above, or a foam ball like Kaotica's Eyeball, or a DIY foam box that can be easily taken apart. These are by no-means foolproof, but can improve the recording. And lastly, there's the good ol' blanket-fort/record under the duvet technique. Just be aware of any rustling of fabrics...  Let's hear it... < incoherent mumbling sounds amidst static noise > ...Well, that's no good. It's cool, I'll just fix it in the mix...While there are some amazing audio repair tools available, nothing quite beats good, clean, well recorded audio. A few minutes of preparation will save hours of tears and gnashing of teeth, and even the recording itself. Thanks for reading!Audio Editing software is designed specifically for the purpose of recording, editing, processing, and mixing digital audio. In this post I'll go over some of the terminology, and look at some of the most popular Audio Editors when it comes to Podcasting. 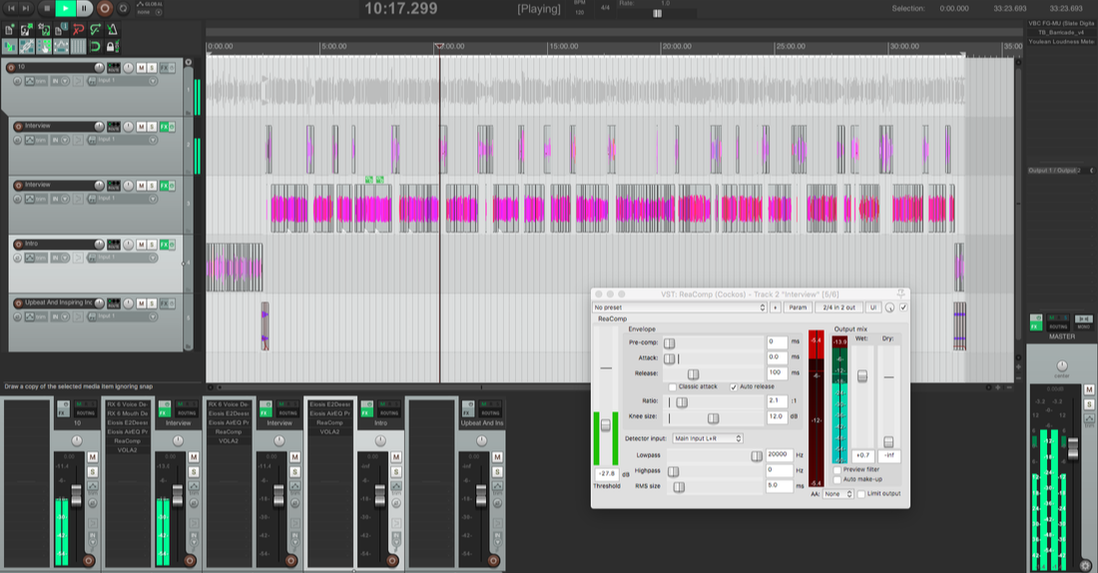 A typical Podcast episode being mixed in Cockos Reaper. DAWsLet's start with DAWs. Pronounced like, "door" with a New Yorker accent, DAW stands for Digital Audio Workstation. A DAW is basically any computer with a hardware audio interface (whether it be a Focusrite Scarlett 2i2, or an SSL Duality), and Audio Editing software. The software allows you to record the digital audio to your computer's drive, edit it, apply processing (EQ, compression, effects, etc...), mix the levels, and more.  I just like this picture. Not all Audio Editors are equalDAWs can vary in their abilities and functionality depending on what they're intended for and the cost. Destructive Editors Destructive Editors make changes to the actual audio files as you edit them in the software - if you cut a chunk out in the editor, that chunk of data will be removed from the audio file immediately. This can be great in that it is immediate, and can be time saving. But, it also means that if you make a mistake, there's a risk that you won't be able to undo it. An example of a destructive DAW is Audacity. Non-Destructive Editors Non-Destructive Editors do not alter the original audio files, but rather apply the changes in real-time during playback - if you cut a chunk out in the editor, that chunk will just be skipped over, and if you want to make a change to an effect or undo a cut, it's usually pretty easy. This sort of real-time processing does require more computer power, and the more processing that is applied, the greater the latency effect during playback. That said, most modern computers have the capacity to handle such processing with minimal side-effects. An example if a non-destructive DAW is Avid Pro Tools. Paid vs. Free There are some excellent free Audio Editors available, such as Audacity, as well as free versions of paid for Editors like Studio One Prime. The "free" free editors are only limited by the fact that they are made and sustained at no cost - so if the developers of Audacity decide to stop supporting it, it could disappear (unlikely, given it's huge community of users). The "free" paid editors will have fewer features and capabilities than their paid-for versions, but are still very capable and in my opinion good enough for podcasting unless you really want the bells and whistles. A downside might be less tech support from the developers. Paid for editors vary in their abilities, from one brand to the next, and even between different versions, for example Hindenburg Journalist and Hindenburg Journalist Pro - the basic version doesn't offer multi-track recording and has fewer processing features.  We've come a long way... Some of the most popular daws
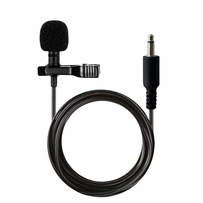
Other DAWs include: Studio One (see above), Mixcraft, Ardour, Cubase, Ableton Live, and more. All of these audio editors will handle podcast recording, editing, and mixing. The best one is the one that works best for you and meets your needs. 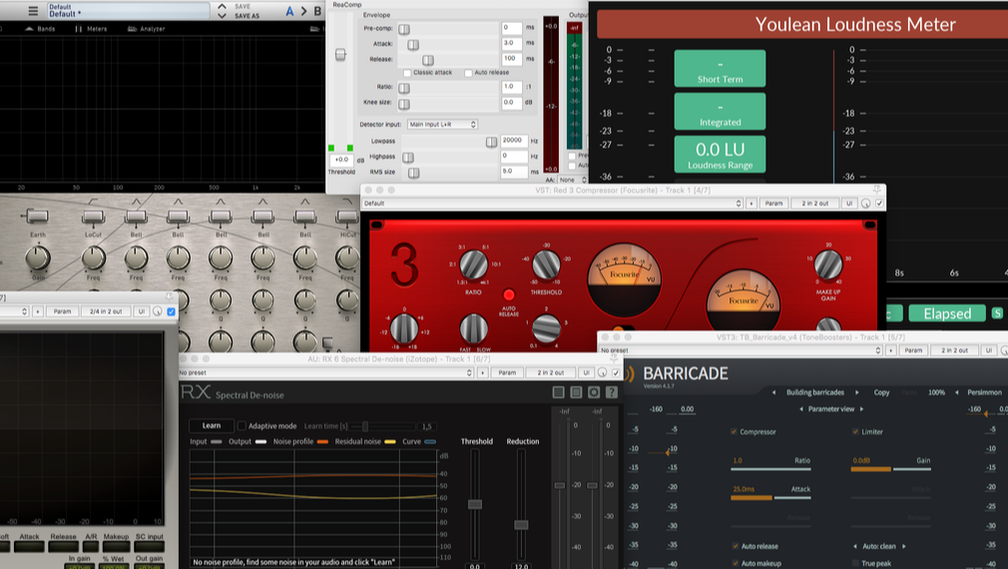 Some Plugins! PluginsI briefly mentioned Plugins above. If you're wondering, "What is a plugin?" they can be thought of as add-ons that give different processing functions to a piece of software. All audio editors come with their own plugins which will apply EQ, compression, gating, and other various effect processes to the audio. The effect is either applied immediately (destructively) or in real-time (non-destructively). Aside from the stock plugins that come with the DAW, there are many third party plugins available. These come in different formats and may not be compatible with some DAWs. Some of the formats include VST (compatible with most DAWs), AU (compatible with most Apple Mac DAWs), AAX (Pro Tools' own format). Thanks for reading!In this post I'll be taking a look at Portable Recording Setups - what might suit your needs as a wandering Podcaster. 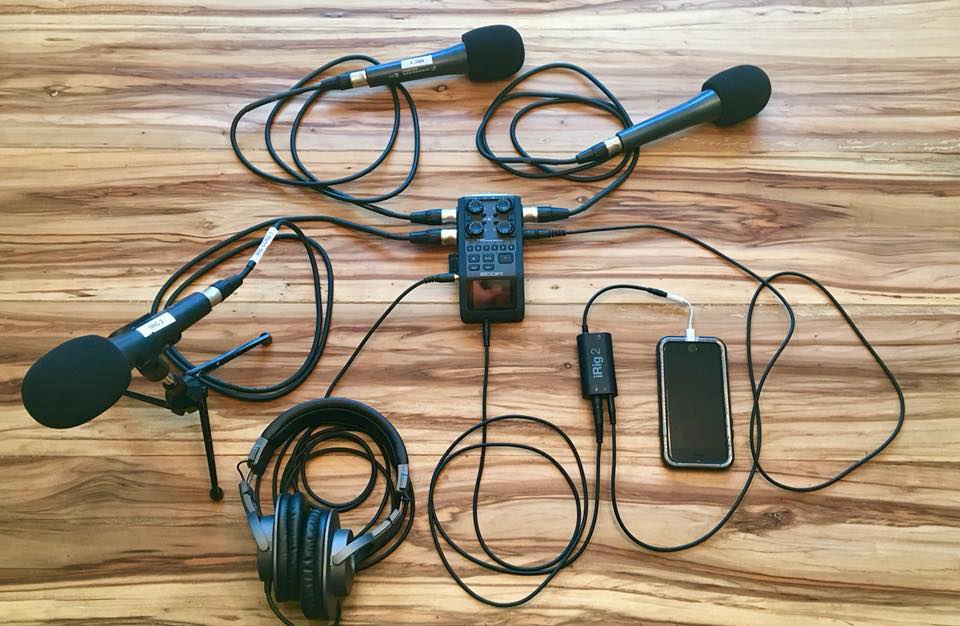 A Zoom H6 Digital Recorder, with 3 XLR mics & a line-in from a smartphone. Portable Digital RecordersThere are many brands of Portable Digital Recorders with various models out there - Tascam, Zoom, Roland, Sony, Marantz to name a few... which you get will depend on your budget and the features you need. All digital recorders (that I know of) have a built in mic, many have a stereo pair. The built in mics work well for general use, but are limited by being attached to the body of the device. If you handle or move the recorder around while recording you'll get some movement noise issues, and if you place the recorder on a table, it'll be susceptible to bumps and variations in loudness as it sits still on the table while you and your guest move around it. Most digital recorders will have an external mic input that you can plug a handheld mic into - usually a couple of XLR or more, but some might just have a single 3.5mm line-in connection. If the device only has one mic input, you at least can hold that mic and move it back and forth between you and your guest, reporter-style, or have the guest speak into the handheld mic and you talk into the built-in mic; if the device has more than one input, you can have more mics and get better separation of sound between the voices. The Zoom H6 with an add-on attachment can record up to 6 mics. Digital recorders will record and save the audio file to an SD card, and may also have a USB connection so that you can plug the device into a computer and directly transfer the audio files from the device to the computer. Some recorders can also be used as USB microphones. The Zoom H4n, for example, can be connected to a computer via it's USB cable and will be recognised by most recording software as a stereo USB mic. 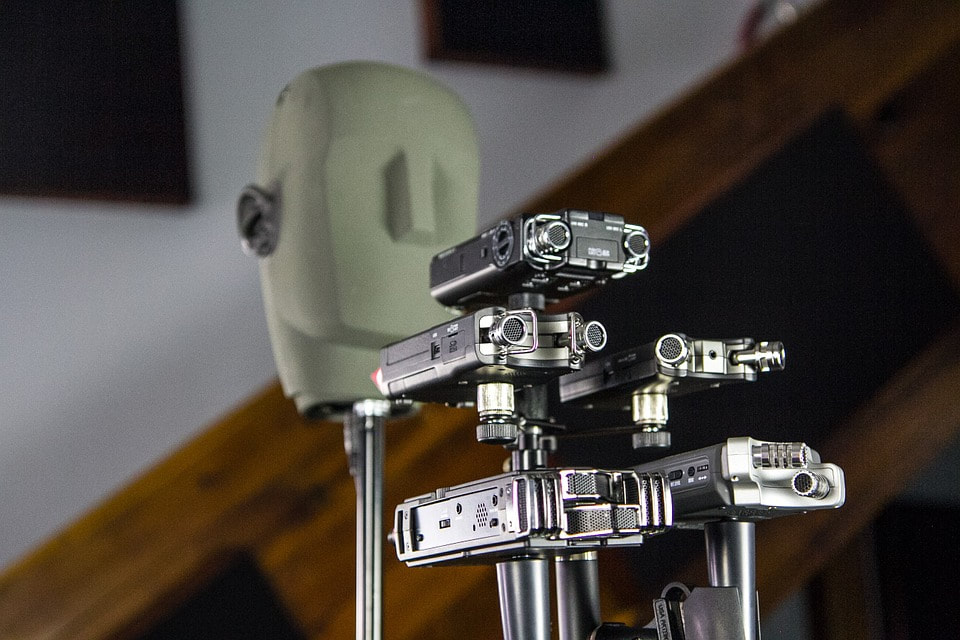 I don't even know where to begin... Your SmartphoneYes, that's right. Your smartphone can be used as a digital recorder! There are many microphone attachments for the various smartphones out there, which will at the very least improve the quality of the recording over the phone's built-in mic. Obviously there will be hardware limitations, but if ultra-convenience is top of your list have a look at Røde's SmartLav+, the Saramonic Smart Mixer, or Shure MV88/A. These are just a few, so have a look see at what works with your smartphone best. Some of the attachments come with their own app, but otherwise there are many recording apps - too many to mention here. Free apps might only offer lossy recording formats (like MP3), or limited recording times; while paid for apps will have more features, formats etc, even basic editing capabilities. If you do choose to go this route, then maybe get a good SD card for your phone to store the recordings on. 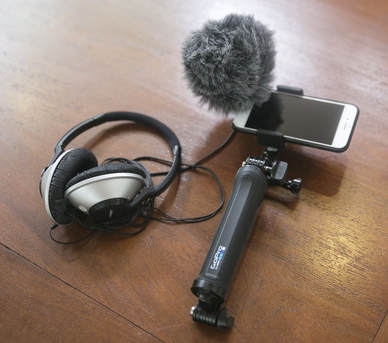 (The mic's under that furry thing.) Accessorize!Here are some items that will help make your roaming recording setup a breeze...
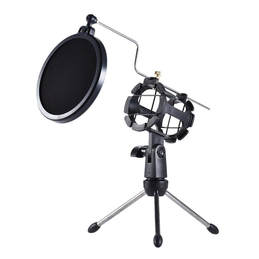
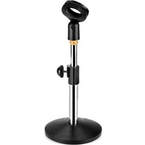
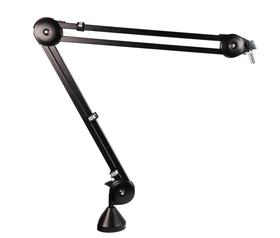
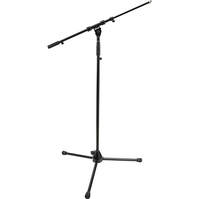
A Blanket or Felt Table-Cloth to place over the table you sit at in order to reduce early reflections (acoustics) and also dampen bumps. Thanks for Reading!In this post I'm going to go over some of the extra hardware bits and bobs that are good to have - some necessary, some not so much.  EssentialsXLR Microphone Cable You'll need this to connect any XLR mic into your pre-amp. Pretty straightforward right? It's worth getting a cable with metal connectors rather than plastic, and spending a little extra on a cable that has decent shielding - the shielding is a wire mesh that is wrapped around the core wires carrying the mic signal, preventing radio and electromagnetic interference of the mic's signal, blips, beeps, hum, noise and even commercial radio signals. If you like to look after your cables and want them to last a long, long time, it's worth learning the right way to coil them up - YouTube to the rescue! Lastly, the Male connector has the 3 pins and the Female connector has 3 holes. In case you were wondering. 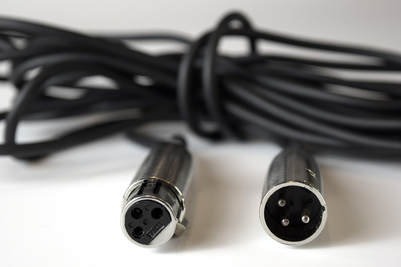 An example of how NOT to coil up your mic cable. Microphone Pop Filter/Wind Shield A Pop Filter is typically a circular hoop with a nylon fabric mesh on a flexible goose-neck clamp. Some are made of metal, but the effect is the same. Pop Filters reduce the force of sound pressure waves coming from your mouth as you say words beginning with Plosives - hold your hand up in front of your mouth and say "Boo" and "Pa". Do you feel the air hitting your palm? That's what the pop filter's for. If that rush of air hits the mic diaphragm, it'll cause distortion to the signal. Try it and see for yourself! Foam Windshields, or Windscreens, have the same effect - stopping rushes of air, whether from breath or wind, from hitting the mic and causing distortion pops. These can be useful if you've not much space in the studio, or do a lot of recording outdoors. If you're outdoors a lot then consider getting a "furry" type windscreen, these are better at dealing with wind - of the weather sort. 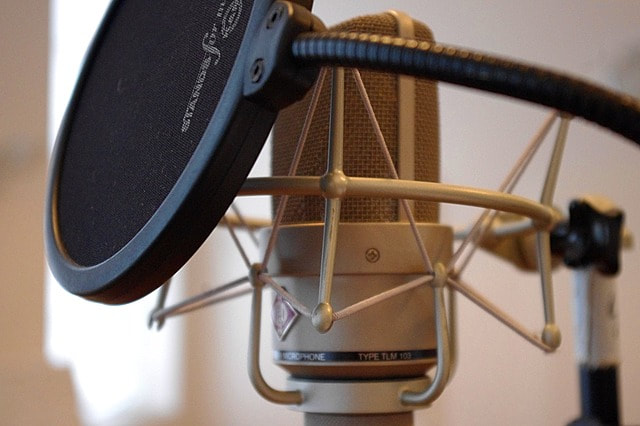 A State-of-the-art Nylon Pop Filter, in it's natural environment. Microphone Stands If you're in a studio environment you'll need something to hold your mic while you talk... if you're out conducting a roving reporter style recording, well, have one for when you're back home.
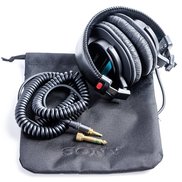
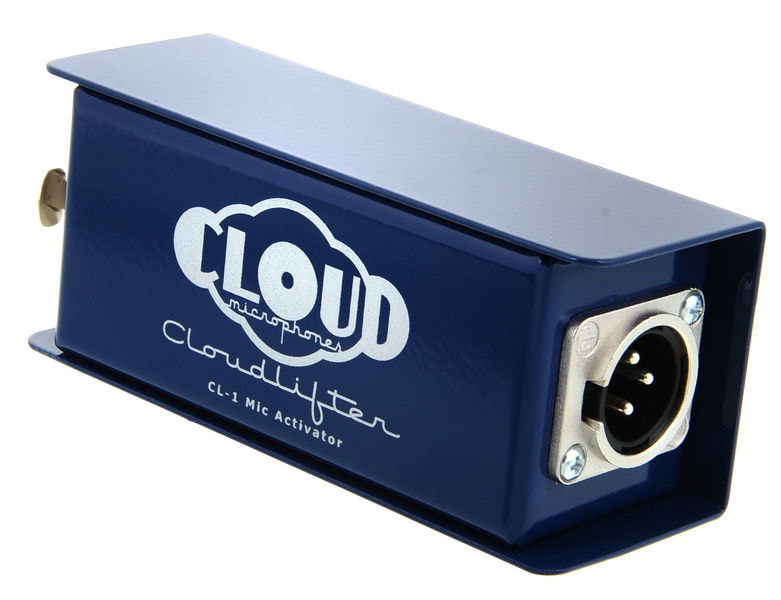
Headphones When recording, you need to be able to monitor the recording - to hear what's being recorded and how it sounds. A good set of over-ear headphones with a Closed-Back design will isolate the sound, so that you can hear it clearly. Noise-cancelling earbuds also work well, but can be uncomfortable and damaging to the ear in the long term. Closed Back means the back covers of the drivers are sealed, cutting out ambient noise better so you can hear the recording more clearly. Other types include Open Back (not sealed) and Semi Open Back (slightly sealed). It's worth getting a set of professional "studio grade" headphones that don't colour the sound being reproduced. Regular high-street headphones are sometimes tuned so that they enhance the audio - this is a no-no, as you want the signal to be as honest as possible so that you can identify if something is wrong with the recording. And lastly, don't get wireless headphones! Because wireless tech needs to digitise the signal > transmit it > and decode it to analogue again, it creates latency in the signal - a slight delay - which will negatively affect your judgement; not to mention that the wireless signal may interfere with your other equipment! 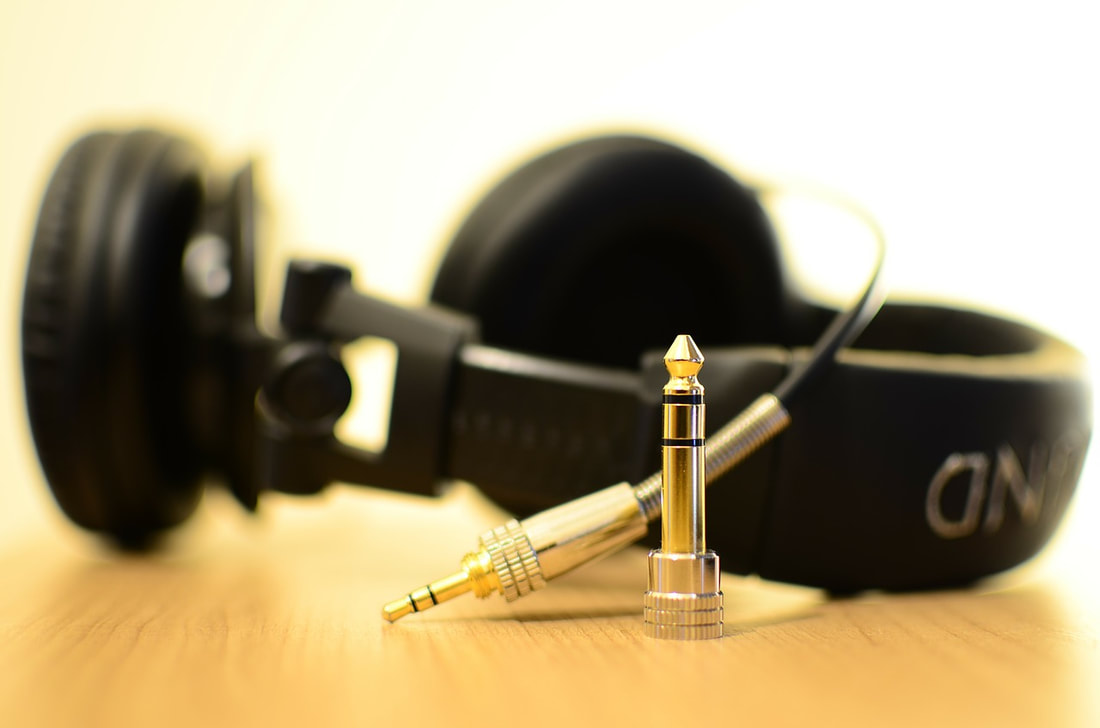 A pair of Headphones in repose. Not so essential but nice to have, maybe. Or depending on your set-up, perhaps essential... you decide!A Headphone Amp If your audio interface only has one or two headphone outputs, and you need more, then a Headphone Amp will be necessary. The headphone amp will boost the signal and distribute it to multiple outputs. Pretty simple right? Just connect it to your audio interface's headphone/line output using a Stereo/Balanced cable, and plug in your 'phones. 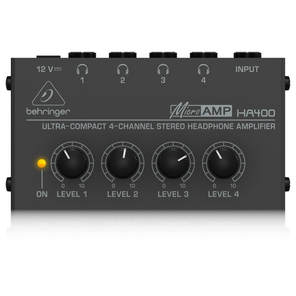 Behringer's HA400 - provides up to 4 Headphone connections, with individual loudness controls. Headphone Extension Cable It's a cable that extends the length of your headphone's cable, for when you can't get close enough to your headphone amp. What more is there to say? I don't know. Maybe leave a comment if you think of anything. A Dedicated Microphone Pre-Amp & Channel Strip Some might want more control over the microphone's signal before it gets digitised and recorded by the computer. There are a number of Pre-Amps with Channel Strips out there that may have an EQ, Compressor, a De-Esser and more. This replaces the pre-amp of the audio interface, so remember not to set the gain too high on the interface's pre since you'll be boosting it with the channel strip's pre. Prices go from cheap... to not so cheap. If you do get one, remember that anything that you do to the signal at this stage likely can't be undone in the recorded audio, so it's important to set it the parameters correctly.  The entry level DBX 286S Pre-Amp and Channel Strip with basic EQ, Compresor, De-Esser & Gate. 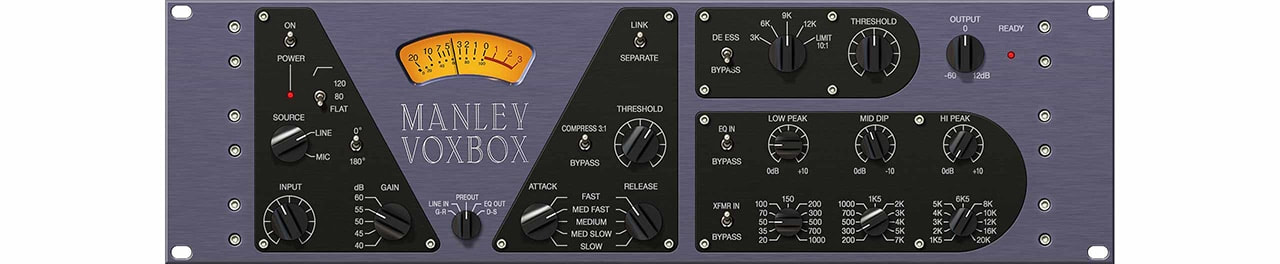 The not-so-entry-level Manley VoxBox with 3-Band EQ, Compressor & De-Esser.
Thanks for Reading!The next piece of equipment in the recording chain, after the microphone, is the audio interface/mixer.  Audio InterfacesAudio Interfaces are in simple terms, external sound cards that plug in to your computer via a USB/Firewire/Thunderbolt connection, allowing you to connect an XLR microphone to the computer to record. Why not just use the sound card that's already in your computer? Well... The Pre-Amp Audio interfaces have one or more microphone pre-amps, that will usually have hardware controls (knobs, faders and buttons) that allow you to adjust the input gain of the pre-amp to increase/decrease the loudness of the microphone's signal, a Pad switch that decreases the input level by a set amount for particularly loud signals, an Instrument/Mic impedance button (which as podcaster you don't need to worry about, just have it on the mic setting), as well as Phantom Power to power Condenser mics, and possibly Phase Invert functions to avoid phasing issues if you're recording multiple mics. The pre-amp of the audio interface will also likely be superior to the bog standard computer sound card's pre-amp. The AD/DA Converters The 'A' is for Analogue, and the 'D' is for Digital. These are circuits that translate the analogue signal produced by the microphone (frequency and amplitude information) in to 0's and 1's, determined by the Sample Rate (how often the analogue signal is measured), and the Bit Depth (how detailed the measurement is)... and back again from digital to analogue, so that you can hear it on your headphones and, or speakers. Again, the AD/DA converters of a dedicated audio interface will likely be much better (accurate) than the converters on a standard computer sound card. Audio Interfaces vs. Mixers
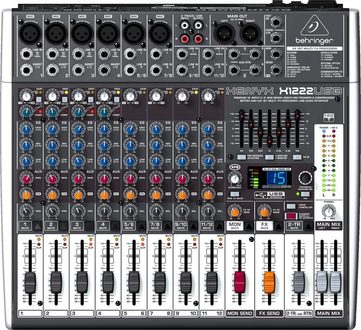
So what's the difference? Both are audio interfaces that can connect to a computer... A Standard Audio Interface A standard audio interface, like the Focusrite Scarlett above, is fine for most situations - you can connect a mic, set the input gain level of the preamp, hit record in your recording software, and you're away... simple. This is fine if you like to apply audio processing (EQ, compression, effects...) after recording, when editing & mixing the podcast. On the other hand... A Mixer Audio Interface A mixer will usually have an EQ, Pan, and sometimes a compressor/limiter and even effects (reverb, delay... delay...) built into each pre-amp channel, or acting globally - affecting all of the channels. Any changes you make to EQ, etc, at this stage will be applied to the signal before it's recorded to the computer, so you'd better make sure the settings are right! Trying to fix the signal afterwards can be a pain :-/ A mixer is ideal for "live" situations, i.e. Radio/Streaming - if you broadcast live and are recording content to be published later as a podcast, and you need to have control over a number of microphones using the sliding faders and mute buttons - then a mixer might well be the solution. Some mixers can also act as controllers of the recording software, so you can make the changes on the mixer and the effect is applied in the software automatically. But this is only really necessary for large multi-track recordings, and not so much for podcast editing. If you do go for a Mixer, be sure to make sure it is capable of recording the number of individual channels that you want - many will combine the microphone channels into a 2 channel stereo signal before converting it to digital for the computer, so if you've 3 or more mics and you want them recorded separately, the separate signals of each channel will be combined to stereo. For example - the Behringer Xenyx 1204USB has 4 XLR mic channels, and combines the signals into a 2 channel stereo output. The Allen & Heath ZEDi-10FX also has 4 XLR mic channels, but will keep the signals separate for computer recording. TIP: If you've just two mics, then you can pan one hard Left and the other hard Right so that each is on a separate channel of the stereo signal. USb, Firewire, Thunderbolt???Don't stress! USB is more than adequate for podcasting. It comes down to how many microphones you're recording and what settings you're using for A>D conversion. If you were recording a 5-piece rock band using 24 microphones, each recording the signal digitally at 32-bit/192kHz, then Thunderbolt would be ideal, or even MADI but we don't need to go there... For podcasting, you're recording fewer mics at a lower resolution of ideally 24-bit/44.1kHz (to be explained why in another post...), so any USB 2 or USB 3 audio interface will be more than enough. Thanks for reading!The humble microphone is the business end of the recording chain, and so having the right mic is a must. In this rather lengthy post we look at some of the different types of microphones, and their characteristics that are useful to know when selecting a mic that meets your podcasting needs.  Types of MicsThere are a lot of different mics available, so it's a good idea to know the basics and what to look for. Dynamic Microphones Dynamic mics are passive in design - they don't need electricity (Phantom Power) to make them work. Essentially, the mic capsule consists of a diaphragm suspended in a magnetic field on a moveable coil. When sound pressure waves hit the diaphragm, the coil moves back and forth in the magnetic field and creates an electrical signal analogous to sound waves - both have frequency and amplitude. Due to the relatively simple design, Dynamic mics tend to be quite robust and can handle loud sounds, but they are also less sensitive to sound (background noises) and higher frequencies. This makes them ideal for live performance use, and podcasting. Condenser/Capacitor Microphones Condenser mics have an active design, requiring Phantom Power to electrify the capacitor element in the mic's capsule. The diaphragm is positioned opposite the electrified capacitor plate, and as sound pressure waves hit the diaphragm, it moves towards and away from the electrified plate, causing the current passing through to fluctuate in frequency and amplitude. Condenser mics are not as robust as Dynamic mics, but are more sensitive to sound, and tend to have a greater frequency response range. As such, they're great for studio recording in a controlled environment. I tend not to recommend Condenser mics for Podcasting because of their sensitivity to sound, however if you are recording in a very quiet or sound-proofed & acoustically treated room, then it might be worth considering the Røde NT1-A, Audio Technica AT 4033a, or the AKG P220 depending on budget. USB Microphones Standard mics require a pre-amp and audio interface in order to connect to a computer to record. USB mics are all-in-one: mic, pre-amp and interface. USB mics can be both dynamic and condenser, and are popular with podcasters due to their design, convenience and portability. Downsides can include cheap components/design, and technical difficulties if you're wanting to record multiple mics simultaneously (there are work arounds though). 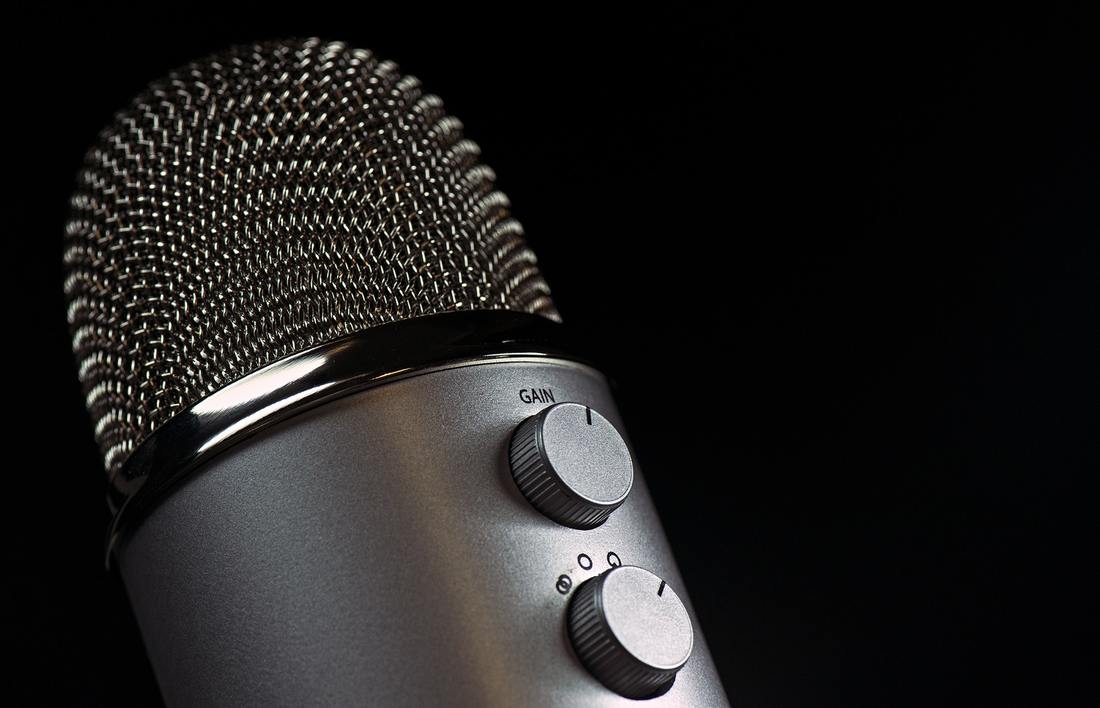 A popular USB Microphone microphone polar patternsA microphone's Polar Patterns indicates the directional sensitivity of the mic to sound around it.
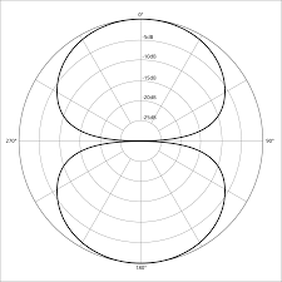
Other Types of Polar Patterns Unidirectional: Highly directional polar pattern, more so than Hyper-Cardioid, e.g. Shotgun Microphones used in TV and film applications. Some podcasters use Shotgun mics, but I kind of think it's overkill. Hemispherical: This is really a type of microphone design, usually with an Omnidirectional polar pattern, where the capsule of the mic is placed very close to a boundary surface (e.g. a table top). This design is good for round table discussions in spaces that have poor acoustics - think company boardrooms, those round/triangular speakerphones that are placed in the middle of the table and usually end up with a knife in them if there's a fight! Microphone Frequency ResponseMost microphones will handle the human voice just fine, but I thought I'd just mention Frequency Response so that it's not a mystery. The Frequency Response of a mic is simply a measurement of the microphone's sensitivity to different frequencies. Human Beings can hear from 20Hz (very low bass) all the way up to 20,000Hz (very high treble). The graph below compares 2 different microphones' frequency responses from 20-20,000Hz:  The top graph shows a mic with a fairly uniform frequency response, whereas the bottom graph shows a mic that is less sensitive to lower frequencies and very high frequencies. Most mic's frequency response is tailored to a particular function or even instrument. The top graph is of a Condenser mic that has a broad frequency range (note the extended higher frequency reach), suited to a broad range of studio functions. The bottom graph is of a Dynamic mic favoured for live stage performance of the human voice. Thank you for reading! |